Slim Tube & Open Fit Retubing
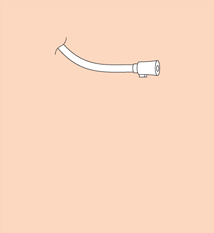
Remove the old tube by pulling it free of the earpiece with a firm tug. Keep this tube handy as a reference when preparing the new tube for the earpiece (Figure 1).
Retubing with the Slim-Tube requires modifications to the tubing provided by the hearing instrument manufacturer. (Please refer to Slim-Tube Modification Chart).

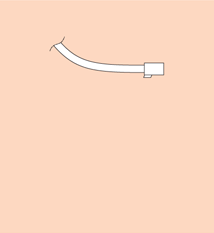
The first step is to remove most of the “retention tail” from the tubing. All three styles of Slim-Tubes require that about 1 to 2 mm of the “retention tail” be left on the tubing. The small stub that remains from trimming the “retention tail” is used to create friction inside the sound bore of the earpiece and help hold the tube in place. You must also remove the retention threads from the end of the slim tube. Refer to the old tube or the Slim-Tube Modifi cation Chart as a guide for these modifications (Figure 2).

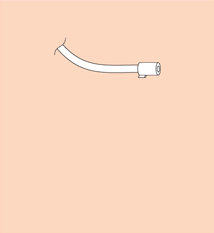
Next insert the modified Slim Tube into the earpiece to verify that the tube fitting is as close as possible to its final position. Reposition if needed (Figure 3).

Once the tube is in position, fit the earpiece and hearing instrument to your patient and visually check to see if any final adjustments need to be made.
Slim-Tube Modification Chart
| Style "A" | Style "A" (modified) | Style "A" 3/4 view |
 |
 |
 |
| Style "B" | Style "B" (modified) | Style "B" 3/4 view |
 |
 |
 |
| Style "C" | Style "C" (modified) | Style "C" 3/4 view |
 |
 |
 |

Web Earpiece Tracker
Track your earpiece order with detail using the WebEar Earpiece Tracker.
Find A Dealer
Easily find a dealer near you. Search by city, state or zip code.
Downloads
Download product brochures, spec sheets, user manuals, and more.
Partner Portal
Get access to Westone media, collateral and materials.